


Published in the October 2009 issue of “Die Porsche Kassette”
Brake maintenance is really one of the simplest jobs you can do on your car.
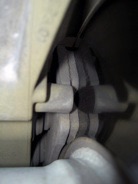
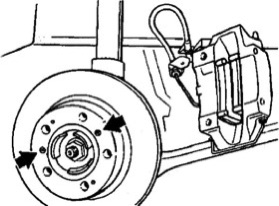
Most importantly is the thickness of your pads, which you can visually check without taking off a wheel.
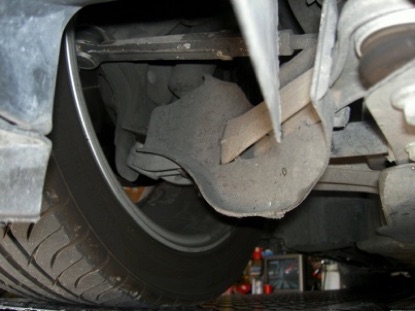
If you determine that you need to replace the pads, either because they are worn or because you want to install different ones for racing, you must first remove the Wheel.
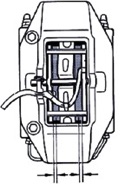
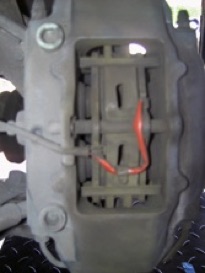
With the wheel off you’ll have full access to the caliper and pads.
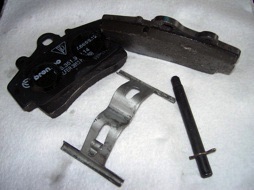
To remove the pads, you just need to pull the retainer’s safety pin and remove the retainer.
Once out, the spring will come next, and once the spring is out the pads can be pulled and replaced
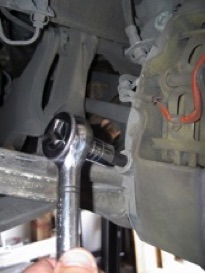
If you need to replace the disc, just a few more steps are required:
Take off the two bolts that secure the caliper to the wheel hub and pull the caliper out of the way.
Remove two small phillips-head screws that secure the disc and pull out the disc.

So, how do we know when the pads need replacing?
There are two ways:
a) You wait for the brake-light to come on, or
b) You look at the thickness on your brakes and make the determination.
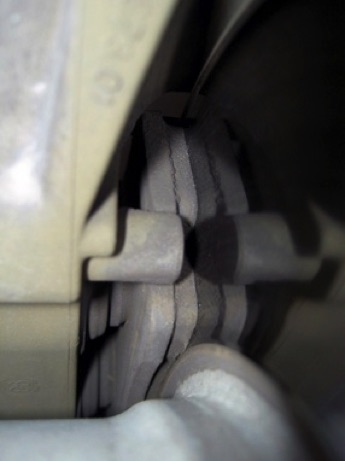
How does the sensor know?
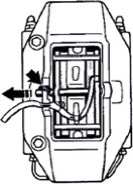
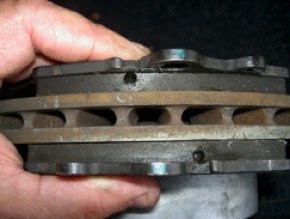
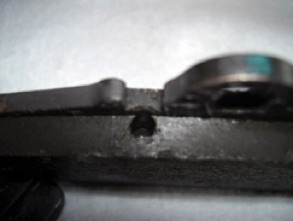
The sensor is inserted in the pad’s hole.
When the pad wears down to the hole, the sensor will scrape against the rotor and create a short circuit, thus triggering the brake-wear light.
Generally when the light comes on you will need to replace the sensors as well as the pads.
The discs also wear down, so you must measure them every time you change pads to make sure they are still within specs.
Keep in mind that the fronts have a different thickness than the rears, so measure them individually.
As a rule of thumb the rotors last the life of two pads. And the rears last twice as long as the fronts.
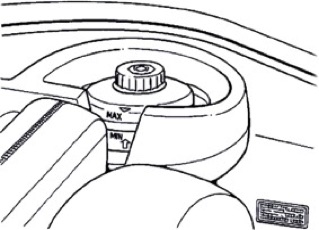
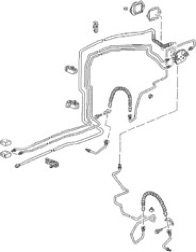
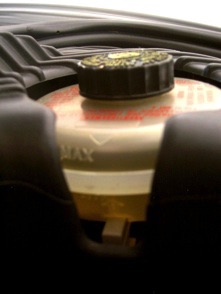
The other components that we haven’t talked about yet, are the Brake Fluid Reservoir,
This is generally located in the front trunk, and is where the brake fluid is poured.
It gives you a minimum and maximum level and you should make sure that it’s never lower than the minimum.
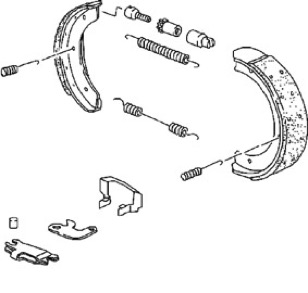
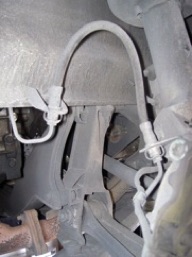
At the two rear wheels we also have the emergency brakes.
This system generally uses the internal part of the rotor or “hat” as a drum brake and two expanding circular pads that press against the hat when activated.
This system is completely mechanical and independent from the hydraulic brake system, but will only activate the rear wheels.
Not great for breaking, but better than nothing in an emergency and great for parking, hence it’s nickname “parking brake”.
The hydraulic system is made up of solid lines that connect the different components.
You may have asked yourself, just exactly how does the whole system work?
Because liquids don’t compress, if you fill a line with liquid and put pressure on one end (pressing the brake pedal) you will have an immediate and equal reaction on the other end of the line, just as if you had a solid rod connecting the two ends.
This pressure at the end is connected to the caliper pistons which move against the pad ,which then presses against the rotor. The harder you press on the brake pedal, the harder the pads press against the rotors.
You will also find four flexible brake lines that connect the solid tube to the caliper, allowing the wheels to move side-to-side, by the steering wheel (for the fronts) and/or up-and-down by the suspension (all four) and still transmit brake fluid.

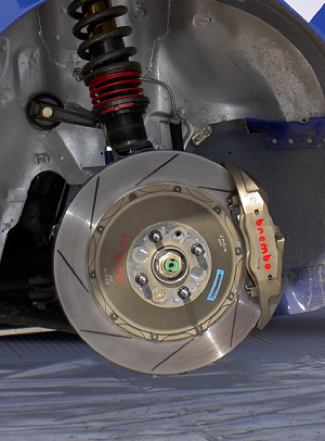
As we explained before, a great amount of heat is generated when stopping the car. Because of that the rotors are internally ventilated, forcing cool air through the inside of the rotors as they rotate. The cars also have cooling ducts to direct oncoming air directly to the front brakes, which generate the most heat because they do the most work.

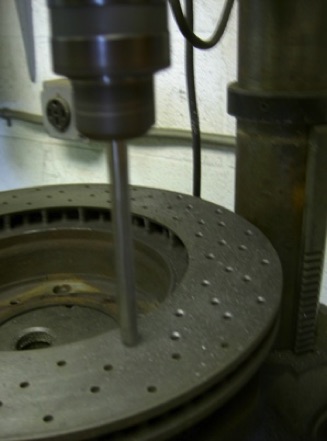
Most of the new brake rotors are now cross-drilled from the factory. The purpose for cross-drilling is to allow for the quick escape of gasses between the pads’ and the rotors’ surfaces. These gasses are generated by the application of the brakes when the great heat generated tend to sublimate some of the pad. A second advantage to cross-drilling the rotors is that there is much less brake fade when wet. One of the disadvantages is that is the cross-drilled rotors tend to crack around the perforations, so chamfering helps to relieve the cracks. Also chamfering eliminates a bit of the cheese grater effect on the pads.
Some people prefer slotted rotors which allow for gas and water to escape, but don’t crack as the cross-drilled.
Brake bleeding is necessary before every DE and once every two years (as per Porsche recommendations).
The reason is that Brake fluid absorbs water. And as you are now very aware, because of the friction, heat is generated while braking. This heat is transferred to the calipers, where the brake fluid resides. Water boils at a much lower temperature than brake fluid (212 vs 400 deg.F).
Once the water in the fluid starts to boil, it will generate bubbles of water vapor in the fluid and will now allow compression and brake efficiency is lost (mushy brake pedal).
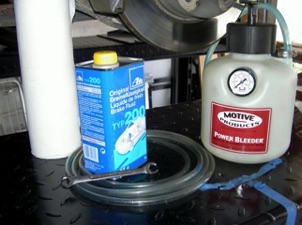
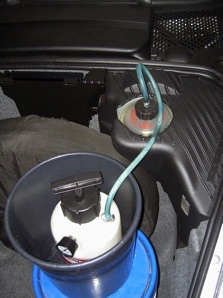
The easiest way to bleed is to use a Power Bleeder.
Pour in one litre of your favorite brake fluid.
Connect the cap to the Brake Reservoir and pump to 20 lbs of pressure.
I place it in a bucket just in case of spills if the pressure line breaks. This way you contain the fluid which is a paint solvent.
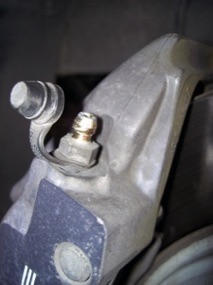
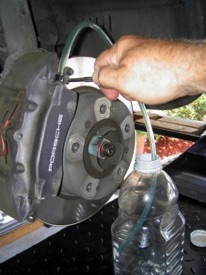
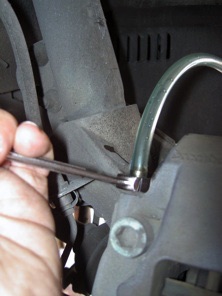
With the system pressurized start with the right rear wheel and pop off the two bleed caps.
Place the drain hose and wrench on the nipple and loosen it. Make sure to catch the flow in a receptacle.
Do both nipples until you get new fluid coming out. If you alternate fluid colors from blue to gold and back, you can clearly see when the new color starts coming out. Then move to the left rear, the right front and finally the left front.
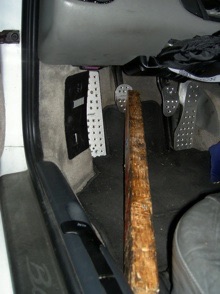
Even though it’s not part of the brakes, it is a good idea to bleed the clutch at the same time.
First you need to depress and hold down the clutch pedal while you bleed it.
You can either have an assistant sit there and do it, or just use a piece of 2 by 4.
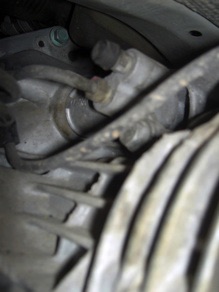
To find the clutch bleed nipple, look on the left, upper side of the transmission.
It’s easier to see than to get at it. You bleed it the same way as the calipers.
After you finish and remove the Power Bleeder, make sure to check the fluid level in the reservoir is full.
For daily driving and AX, the stock brake pads are great, but for fast track days you really need a specialized brake pad that can take the additional heat generated by the higher speeds.
If not, you will experience brake fade.
I particularly like PAGID Orange Racing Pads.
They really are orange .... well, at least when you mount them, because after the first couple of laps the heat turns them black.
These pads have no sensor holes, so the sensors must be zip tied out of the way.
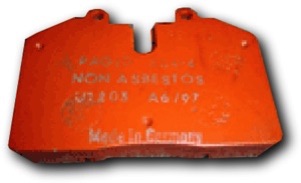
If installing Racing pads, keep in mind that they are not DOT legal.
They will not brake properly unless they are VERY hot, as I found out for myself on my way to Sebring a few years ago.
Happy Porsche’ing,
© 2009 Technolab/PedrosGarage.com