


CVJ (Constant Velocity Joint) Boots are wear items that need tom be checked and occasionally replaced. Six (6) speed transmissions wear the CVJ Boots quicker than the five (5) speed transmissions because of the more exaggerated angle of the half axles due to a higher mounting point of the 6-speed tranny.
The CVJ Boots are easy to oinspect visually. Get under the rear of the car and look at the axles connecting each side of the transmission to each rear wheel. At the ends of the axles you will find the black rubber CVJ boots. These boots need to be in good shape with no cracks, tears or rips. They are packed with special CVJ grease that will escape thgrough any opening. If the grease leaks out and the joint goes dry and or it collects dust and road grime it will have to be replaced, and they're not cheap.
Tools needed:
Sockets (13,14, 15, 16, 17, 18 19 and 32 mm)
Good, long break bar for the wheel center nut or powerful pneumatic gun (400 lb-ft of torque)
Wrenches (16, 17, 18, 19 mm)
Hydraulic or mechanical jack
Jack stands
Mallett
Crimping tool / wire cutter
C-clip pliers
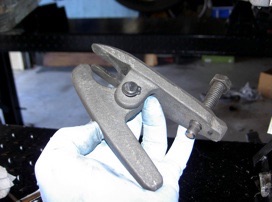
Joint-cracking tool
Torx bit (size T-40)
Assorted screwdrivers and pliers in different sizes
Roll of paper towels
Rubber gloves
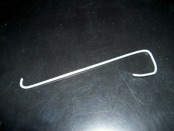
Wheel center cap removal tool
(which you can DIY from a piece
of clothes hanger).
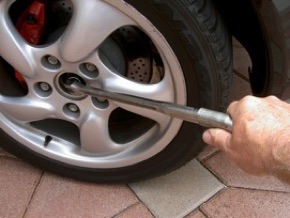
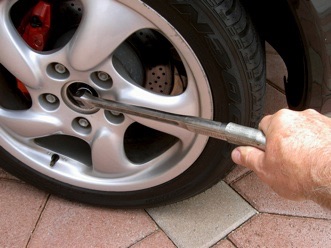
With the car on the ground, place it in gear
(1st) and engage the parking brake. Loosen
but don't remove both of the rear axle locking
nuts. These are tightened to 340 lb-ft of torque
so you'll need to use a long breaker bar or a
strong enough pneumatic hammer. It uses
a 32 mm socket. You may hace to stand on
the breaker bar in order to get it loose.

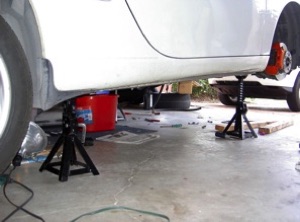
Now, raise the car off the ground and place it on sturdy jack stands (at least on the rear).
Secure the front end with wheel chocks so it can't move forward while you raise the back end.
Remove the rear wheel(s) and axle nut(s).
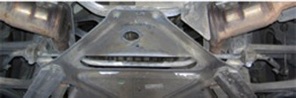

Remove the diagonal cross braces and aluminum skid plate.
Fourteen (14) main fasteners need to be removed for this.
Each diagonal cross brace has 5 fasteners (combination of bolts and nuts).
The cross braces have two additional Phillips head screws that attach to the plastic undertray
that also needs to be removed for ease of work.
Undo the end of the anti-sway bar by removing the
bottom nut.
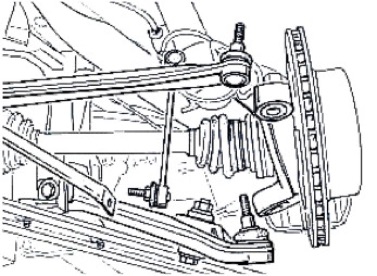
Undo the ball joints on the toe arm and on the wishbone end
You'll need to use a joint-breaking tool. Be careful that you do not damage the rubber dust covers on the joints.
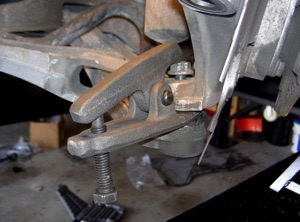
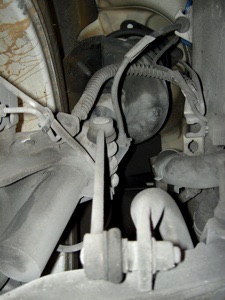
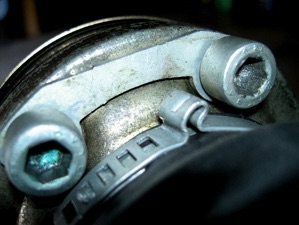
Remove the bolts from the drive shaft flange (8mm hex). It will be easier to use a ratchet-mounted 8mm hex drive on a 9" extension and un iversal joint at the end.
You'll need to press against the CVJ boot's side in order to get the hex to fit in the bolt head.
It may be easier to rotate the axle so that you can position the bolt head in an accessible point. To do this put the transmission in neutral and release the handbrake.
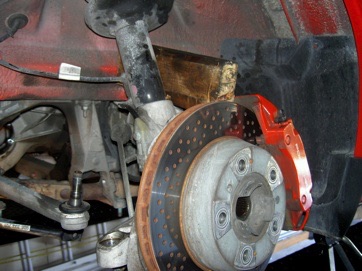
In order to have enough clearance, pull the wheel carrier assembly out towards you and hold it out by propping it with a piece of 2 x 4 lumber between the inner wheel well and the inner edge of the brake rotor.
Now you will be able to remove the half-axle by yourself without danger of damaging the end or hurting yourself.
with the added clearance you can slide the drive axle off the flange.
It may be necessary to tap the end of the axle with mallet using a piece of wood to protect the end from damage.
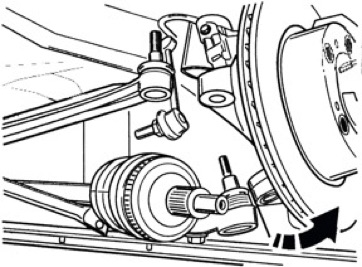
Because I was working by myself, some pictures could not be taken, so I substituted with drawings.
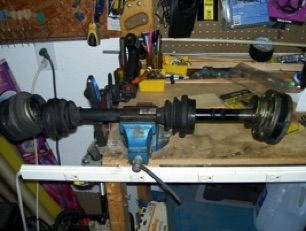
You can now maneuver the complete half-axle out of the car. Make sure you don't damage the endcap. It can dent easily.
I generally wrap the end in a rag or other protective material before I remove the half-axle, jsut in case.
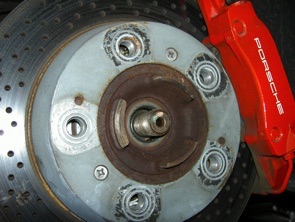
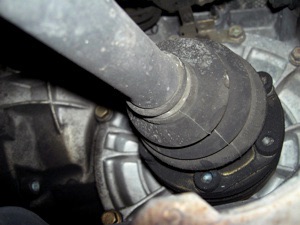
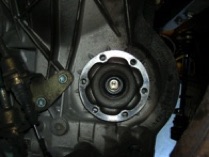
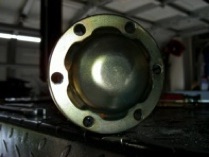
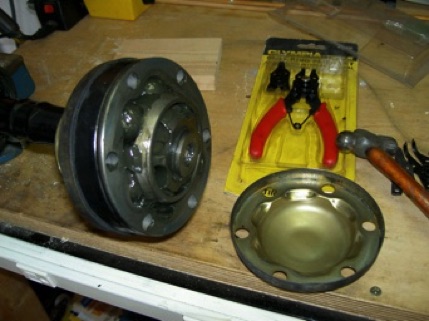
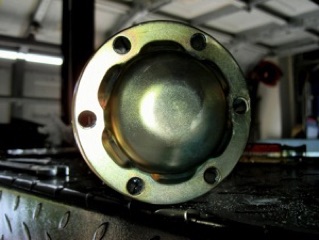
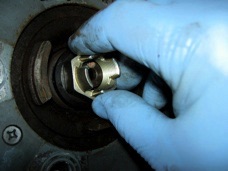
The first picture is of the transmission's flange after removing the half-axle. The second is the half-axle's endcap.
Here's where it will start to get dirty (greasy).
I recommend using rubber gloves and having plenty of paper towels handy as well as a trashbag or garbage container.
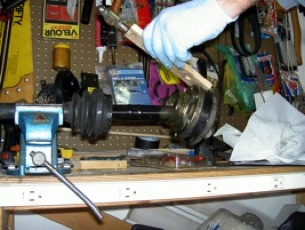
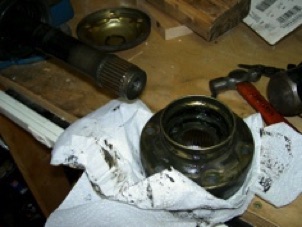
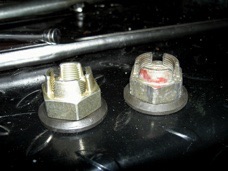
Carefully tap off the endcap using a piece of wood or plastic rod in order not to damage it. I prefer to replace this part with a new one whenever I replace the CVJ boot.
It's relativelly inexpensive.
Clean off the grease as best as possible from the CVJ and endcap if you are going to reuse it.
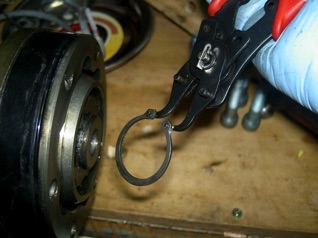
In the photo (left) you can also see the C-clip pliers needed for the next step.
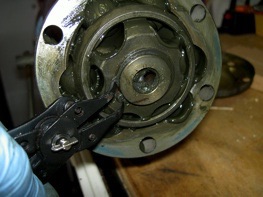
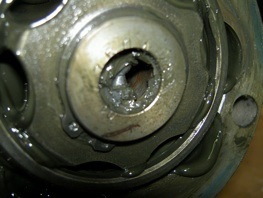
Remove the C-clip (Snap ring) from the end of the half-axle using special pliers.
Remove the old CVJ boot clamps and pull back the boot (towards the other end of the shaft).
Tap out the inner CVJ using a piece of wood or plastic in order not to damage it.
Slide the two old CVJ boots off the half-axle.
Wipe off grease as best as possible
Slide the new outer CVJ boot on the half-axle. Take into account that the large opening should slide in first

Slide the inner CVJ boot on the half-axle. Now the small opering slides in first.
Place the clean CVJ onto the end of the half-axle and secure with a new C-clip (snap ring).
Carefully tap into place the inner metal endcap, or better yet, replace with a new one.
Make sure it does not get bent or kinked. Tap softly around the edges using a piece of soft wood so that you don't damage the cap. I use a piece of aluminum tube large enough to clear the center.
Pack the inner CVJ with Opimoly HT grease (on both sides of the CVJ) and slidethe boot in place. In order to get the boot to slide easier onto the flange of the CVJ, rub a little grease on the edge of the flange. You may also have to use a screwdriver blade to help you place the boot opening onto the flange.
Repeat the above steps for the outer CVJ boot.
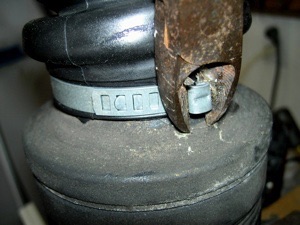
There are two types of CVJ boot clamps available. One is the crimp-type (shown) and the other is a simple slide-through and bend-back.
Either type must fit snugly and secure so that the boot makes a secure seal against the flange and around the half shaft and no grease leaks out (especially when hot).
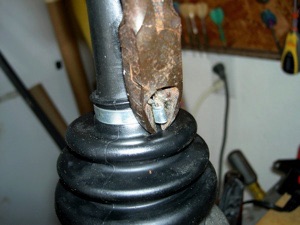
If using the crimp-style, put the clamps in place, and close them by hand as much as possible. It may help to reshape the end of the clamp so it conforms with the size and shape of the boot and the base of the clamp.
Once the clamp is tight by hand, you can crimp using (dull-edge wire cutting pliers).
Repeat the above procedure for all the additional clamps.
If using the pull-through type, pull the clamp through the end opening of the base of the clamp and bend back for securing.
On the inner CVJ end, make sure that the crimp falls between two bolts and won't interfere with bolt placement.
Clean the six hex head bolts and slide them in place without forgetting the spacers.
Place a drop of Locktite on the end of the bolt threads.
Insert the completed half-axle in place.
Mate and tighten the inner CVJ to the transmission flange.
Tighten the bolts by hand first, then torque in star pattern.
Finish tightening to a torque of 30 lb-ft (40 Nm).
Repeat for the second half-axle if required.
Install the aluminum skid plate.
Secure it loosely with the two forward bolts and two rear bolts. Do not tighten yet.
Install the diagonal braces.
Tighten all the hardware according to specs:
• Aluminum skid plate to rear axle support (M10 bolt) at 34 lb-ft (46 Nm)
• Aluminum skid plate to support / suspension (M10 nut) at 48 lb-ft (65 Nm)
• Diagonal brace to body at 48 lb-ft (65 Nm)


MAINTENANCE
CVJ Boots & Axles